
Building a chatbot
Chatbots are the way forward for any business looking to automate any repetitive or menial task. Now that you’re interested in creating a chatbot, the first step is to open the Bot Studio. You can create a bot in 2 ways: from scratch or using a pre-built template.
Choosing a Channel:
Any bot you make is specific to a particular channel. No matter the method of creating a bot, you need to choose a channel. i-genie currently supports Web, Facebook Messenger, WhatsApp, and SMS.
You can always clone a bot to another channel at any time
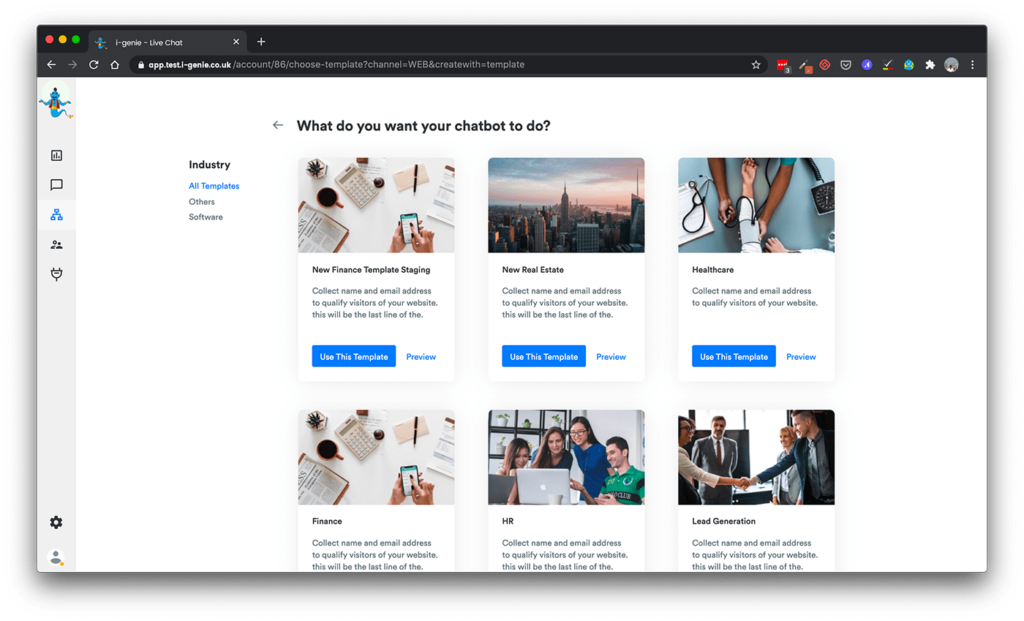
Choosing from pre-built template:
If your an amateur, it would be wise for you to build your bot using one of our pre-built templates. Choose from an array of templates made by industry veterans that fit your use-case.
If you’ve chosen to build a bot from scratch you would directly be routed to the bot builder page after choosing a channel.

Our conversation design regularly keeps updating this repository with new templates
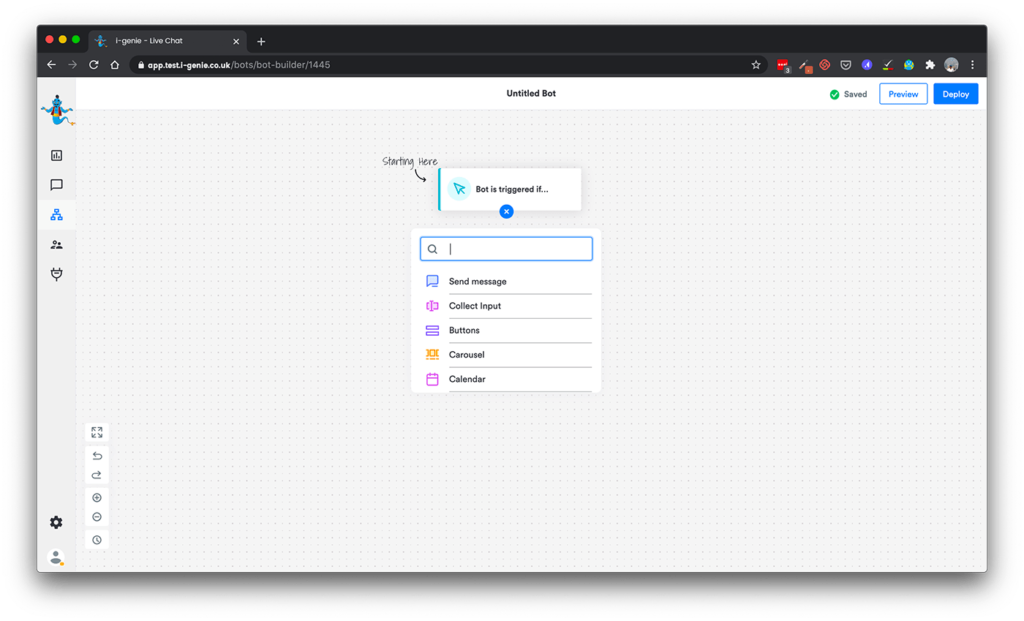
Have a trigger condition?
As a user, you can build as many bots as you want for varying use-case or occasion. By default, if no trigger is specified the bot will show all visitors coming to the channel where you deployed the bot.
If you want to specify a trigger condition to show this bot, like using this bot for Christmas or having a pricing bot for visitors coming to your pricing page, you can do so here.

Add action blocks:
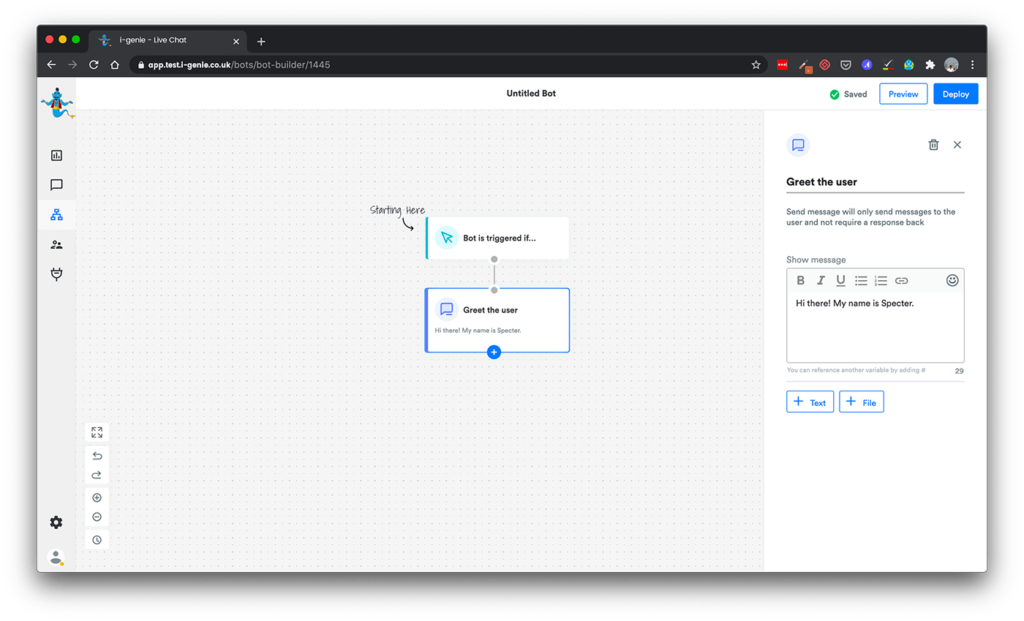
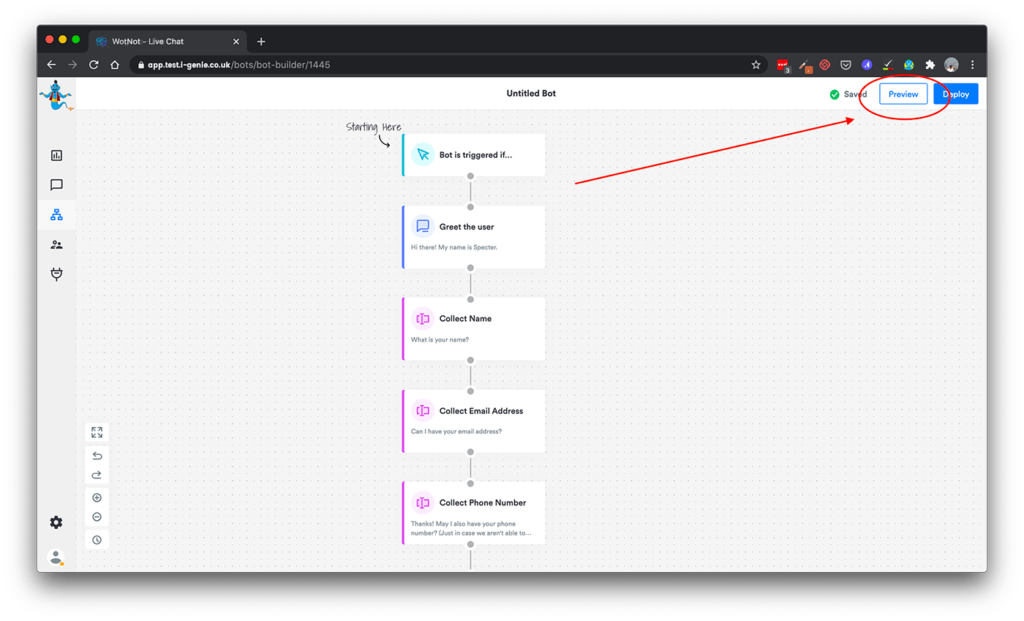
A bot is made up of multiple action blocks connected to each other in chronological order. Click on the ‘+’ to select from a wide array of action blocks to build the conversation flow as you want.
In our example, we will first greet the visitor and collect their contact details to schedule an appointment.
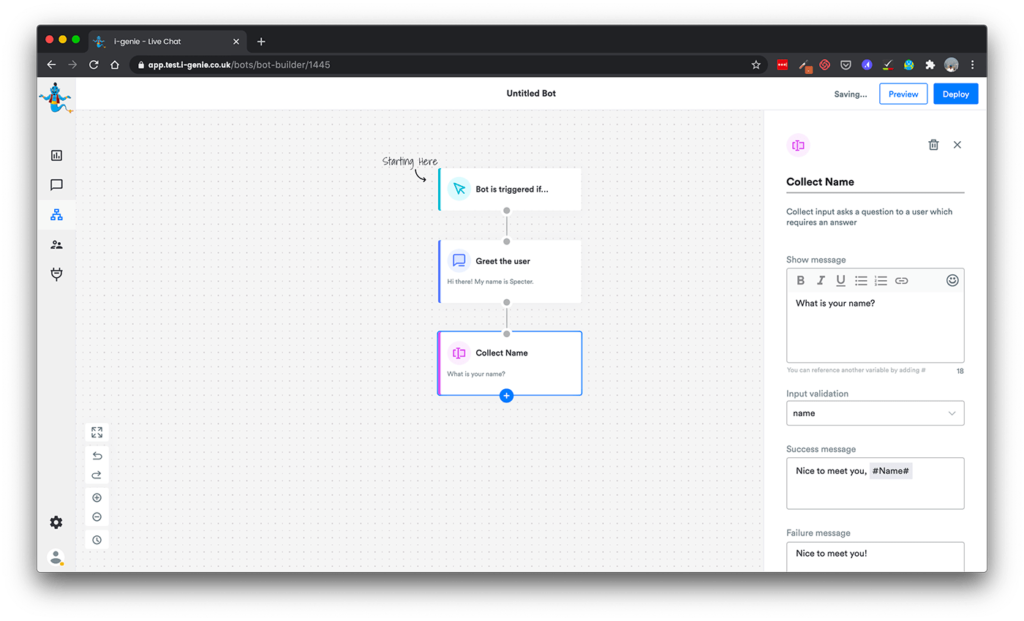
Configure the action block in the right panel:
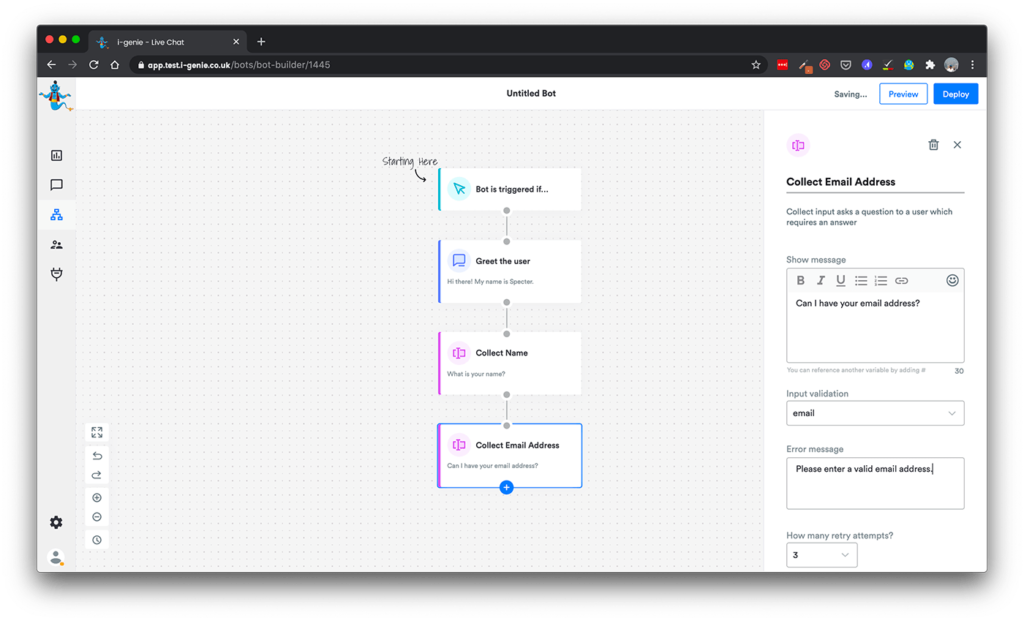
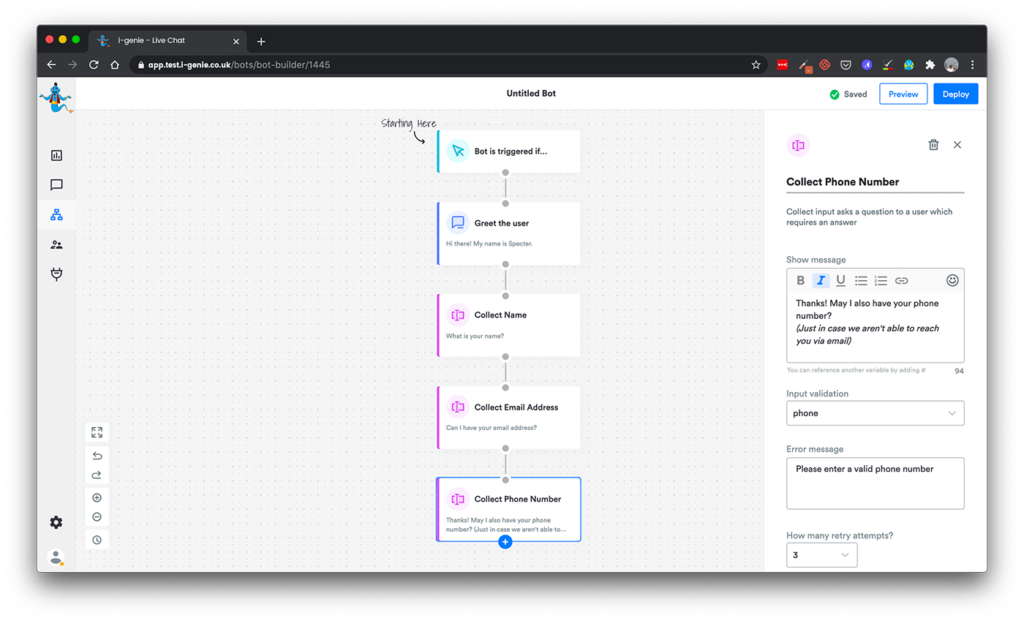
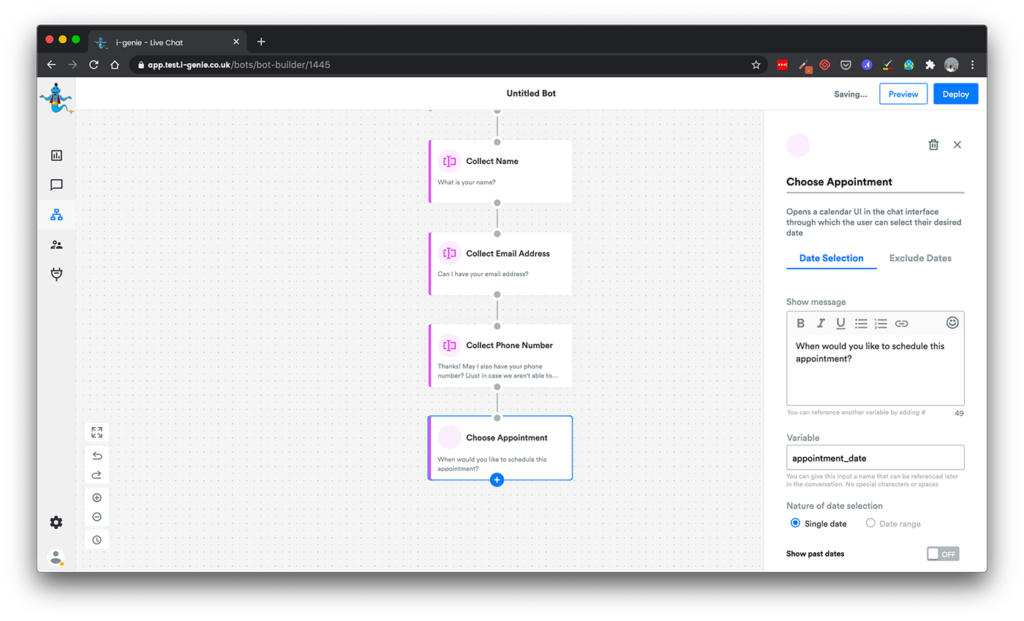
To collect an appointment, we want to collect the visitor’s name, email, phone, and date of appointment.
Asking the name
Asking their email address
Asking their phone number
Choosing the appointment date
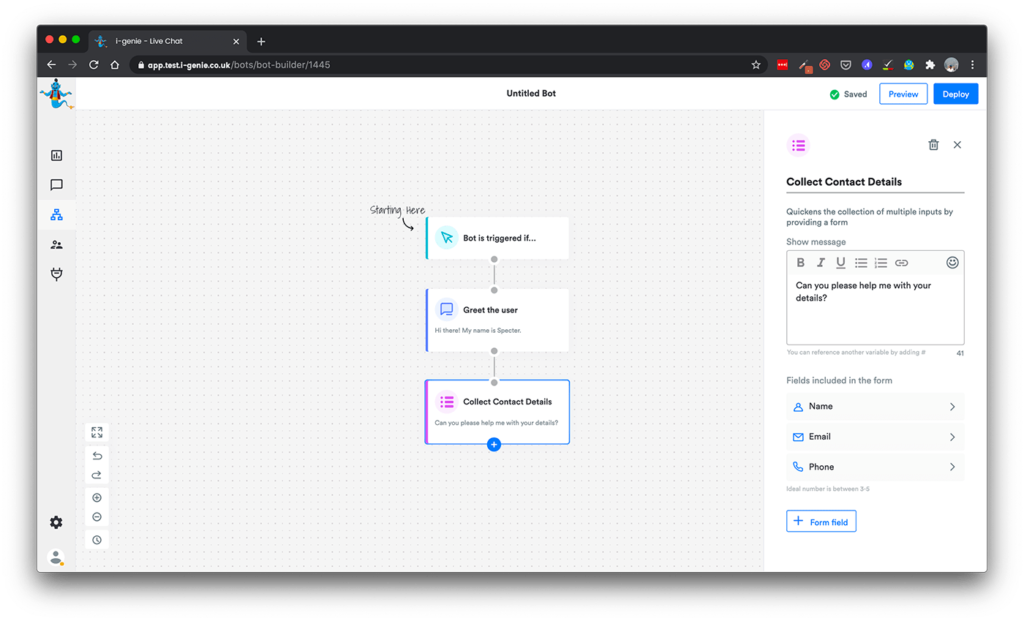
Also, instead of collecting these input details separately, you can also use ‘Form’ to collect them all at once.
Alternatively, instead of collecting all the contact details individually, you can use the form action block,
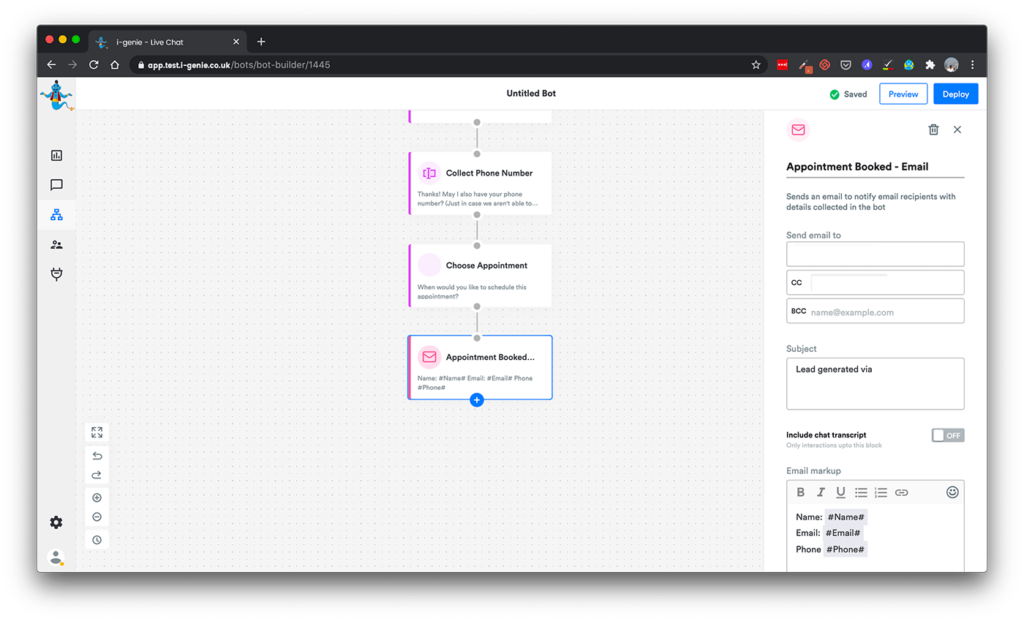
Get notified via email:
Once all the details are captured by the bot, we can use the ‘Send an email’ block to get notified that an appointment was booked.
In this email, we can either show the entire chat transcript of the visitor’s conversation or only the fields that you want like name, email, phone, date of appointment.
Test your flow:
Once you have completed making the flow for your bot, click on the ‘Preview’ button to test the bot. A pop-up window will appear with the flow that you made.
Deploy the bot:
If you’ve not already added the code snippet on your web, you will need to do so, so that i-genie chat interface can appear on your website. This would be the interface through which the visitor will interact with the bot.
And if you’ve already done it, the conversation flow you’ve just made will be deployed.

Last & most important step: Stretch your legs and sip on a beer
The bot will continue performing the task that you defined which in our case is scheduling appointments. You will keep receiving emails whenever an appointment is booked, and see your business grow.
Analyse the result & improve:
Head over to the analytics dashboard and see the numbers grow.